This guide is how I set up new projects to run unit tests automatically when I push a commit or merge a branch on GitHub for iOS projects.
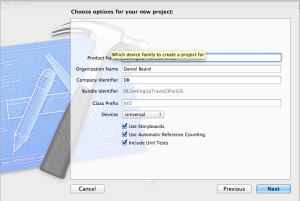
The first step is to create a new project in Xcode. I am going to select a single view application and enable storyboards, Automatic Reference Counting and Unit Tests.
All I’m going to change is the testExample method in the unit testing bundle to something that will pass. For now I have just gone with this:
- (void)testExample
{
    STAssertNil(nil, @"This object should be nil");
}
Check that the tests pass by hitting cmd+u. Now that I have my unit tests passing, I’m going to add this project to GitHub. I’ll leave the details out here, as this isn’t the focus of this tutorial but you can find my example project here: https://github.com/daniel-beard/SettingUpTravisCIForiOS.
Now we can setup the TravisCI build. I use the xctool to build my projects as it has a nicer output and is easier to use than the built in xcodebuild tool. Add xctool as a submodule to the git repository using the following commands:
git submodule add https://github.com/facebook/xctool.git ./xctool
git submodule update --init
git commit ./xctool -m "Added xctool as a submodule"
Then we need to add a config file so that travis-ci knows how to build our project. This file is named .travis.yml and lives in the root of the git repository. Here is the contents of mine:
before_install: "git submodule init && git submodule update && sudo gem update --system && sudo gem install bundler && bundle install"
script: "bundle exec rake test --trace"
Then we have to add a Rakefile that tells the xctool which project and target to build:
desc 'Run the tests'
task :test do
   exec('xctool/xctool.sh -project SettingUpTravisCIForiOS.xcodeproj -scheme SettingUpTravisCIForiOS test')
end

task :default => :test
And finally the Gemfile
source 'https://rubygems.org'

gem 'rake'
You can then test locally that your project builds using the command rake in your root git repository.
I get build messages, then ** TEST SUCCEEDED: 1 of 1 tests passed ** (25285 ms). Now that we have the unit tests running locally, all that is left is to set up the travis-ci build. Login to https://travis-ci.org/ with your GitHub account and under account settings select the repository that should be unit tested automatically. This automatically sets up a service hook in GitHub so that every time you push to your repository, it will get unit tested.
You can also use the status images from travis-ci to show the test status directly in your README file on GitHub. Check out my example project here: SettingUpTravisCIForiOS
